Welcome to PACZKI!
Starting a new transaction on PACZKI is simple, but it’s essential to carefully follow each step to ensure a smooth and secure process. This guide will walk you through initiating a Checkout Ticket once you’ve finalized a deal with another user.
Step 1: Access the Checkout Ticket Page
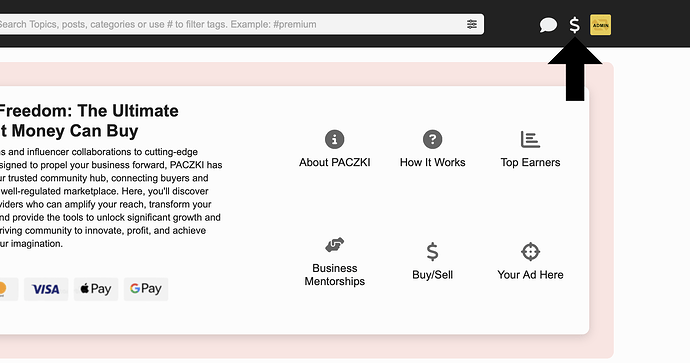
- Locate the Dollar Sign: Begin by clicking the US dollar sign icon in the upper-right corner of the PACZKI website.
Step 2: Initiate the Checkout Process
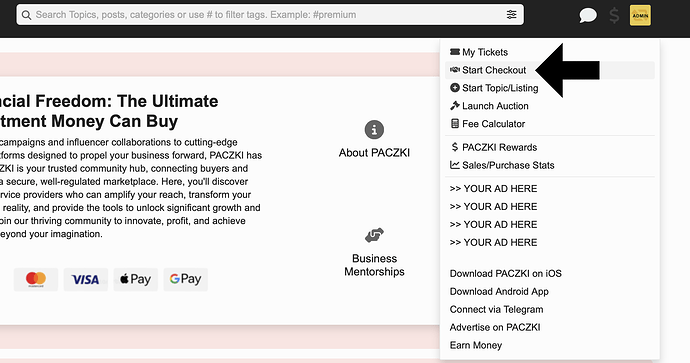
- Start Checkout: After clicking the dollar sign, select the “Start Checkout” option to begin the process.
Step 3: Specify Your Transaction Partner
- Search for Username: In the designated field, type in the username of the member you’ve made an agreement with. Ensure accuracy to avoid delays or confusion.
Step 4: Enter Transaction Details
- Complete the Form: Follow the on-screen prompts to fill in the transaction details, including:
- Asset/Service: Provide a clear description of what is being exchanged.
- Price: Input the agreed-upon amount.
- Payment Method: Indicate the payment method. For more details, see our Payment Options Guide.
- Terms: Define the terms of the agreement. These terms are binding and enforceable as part of the Checkout Ticket.
Step 5: Understand Your Responsibilities
- Adhere to Guidelines: Ensure compliance with our buyer responsibilities and seller responsibilities. These rules are designed to protect all parties and uphold fairness in transactions.
Step 6: Calculate Fees
- Fee Calculator: Before submitting your Checkout Ticket, use our fee calculator to determine the applicable fees. This will help both parties understand the total cost of the transaction.
Finalizing the Transaction
- Review and Confirm: Double-check all fields, review the transaction details and fees, then submit your Checkout Ticket. Note that once a Checkout Ticket is initiated, it cannot be canceled unless both parties agree to terminate it.
By following these steps, you can confidently initiate a transaction on PACZKI. This process ensures clear communication and secure exchanges for both buyers and sellers.

